

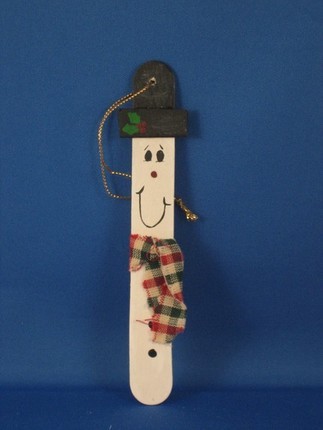
I started with this picture....
 Here is your supply list.
1. Crafting sticks or tongue depressers (a TON) - I used two full ones for the name plate, one for the front and one for the back, plus I used two more for the family. Dad and Reid were one and then mom was a separate one. I used the left over from mom for another child's.


2. Old fabric for the scarves
3. White and black paint and brushes
4. Black and Orange, and Silver Sharpies
5. String, cord, yarn
6. Hot Glue
7. Black Felt
8. Greens * optional*
Directions - I apologize there are not pictures of the process but it was easy!
1. First - figure out how many moms, dads, and kids you will need. Then cut them accordingly. If you are doing a class set, give each kid a paper towel and then have them write all their names on it. This will save you time in the long run.
2. I made piles for mom, dad and then the kids. I did the siblings after.
3. Give each kid a paint brush and have them paint their sticks white - front and back.
4. Once they are dry, let them paint the top "hat" part black and let that dry.
5. Have them use sharpie markers to mark the buttons, faces, and noses.
6. Cut small slits of black foam and put the names on top (see where you can do this part after school if you have it already on the paper?) You are welcome!
7. I then glued each member on a a stick. When they were stuck, I put a top stick over to cover the family.
8. I wrote the family name on the bottom and the year on the back.
9. Hot glue the hats on the top part.
10. I cut strips of fabric and had the kids tie them around the necks.
11. I hot glued the pieces of green on the bottom (this was from a mini tree in the garage)
12. Hot glue the cord, yarn or string on the back!
How cute is that!?


No comments